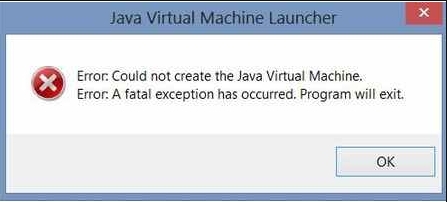
While refreshing your PC or restarting your device doesn’t help, it mainly happens due to problems with Java Virtual Machine. Yes, you got that right. Java is extensively used for developing apps and games requiring Java Virtual Machine or JVM in your device to run. So, if you want to eliminate it, we have covered you all!
How to Fix Could Not Create the Java Virtual Machine Error?
Several methods exist to solve the JVM error, and we have mentioned the effective and working ones. Below mentioned is a list of the same!
Method 1: End All JVM Instances and Try Again
Often the Could Not Create The Java Virtual Machine error is a temporary glitch for unknown reasons. Hence, ending all JVM processes effectively solves the problem. Follow the steps given below to do so:
Ensure that your Windows is updated to the latest OS version Press the Win key, search for Task Manager, and click on the first search result Go to the Processes tab, navigate to Java Virtual Machine, right-click on it, and press the End Task button
You should end all the related processes also along with it.
Method 2: Expand Available Memory for Java Applications
Your PC has a fixed amount of memory available for running Java apps. If any app or software exceeds the default heap memory allotted, you will encounter the Could Not Create the Java Virtual Machine Error. Instead of confining yourself by using Java apps and consuming lesser apps, you can increase the available memory. Follow the steps given below to do so:
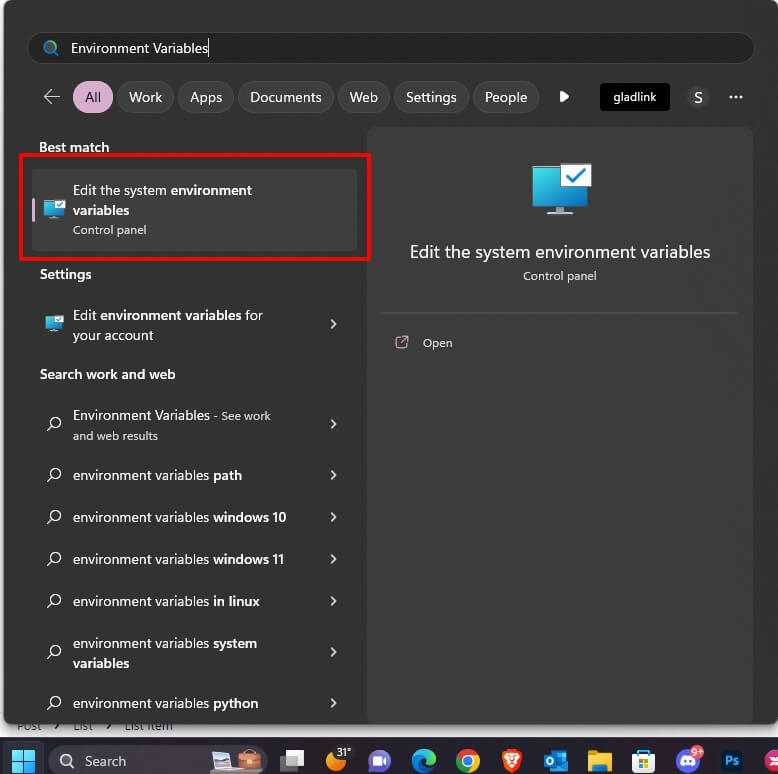
Press the Win key, search for Environment Variables, and select Edit the System Environment Variables from the search results.
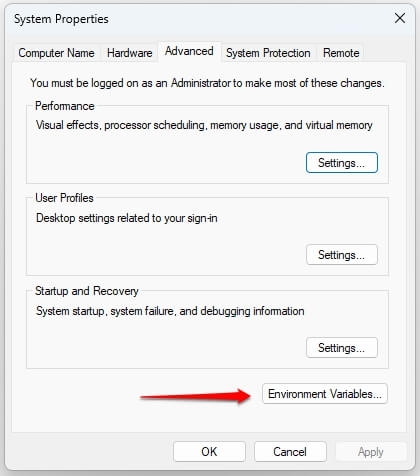
Press the Environment Variables button from the System Properties pop-up that appears.
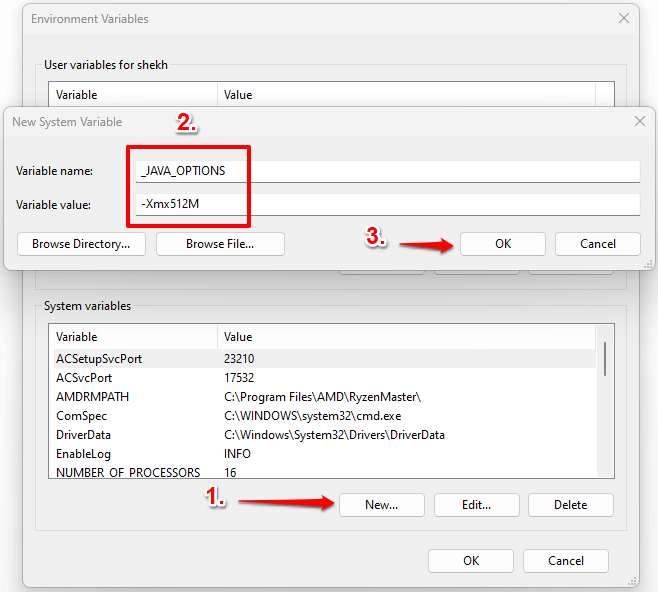
Choose New in the System Variables option and enter its name as _JAVA_OPTIONS and value as -Xmx512M.
Click on OK and press the OK button again to save changes.
Thus, when you open the Java application, you will see the error. If you still want to increase the memory, you can repeat the process and change the value to -Xmx1024M.
Method 3: Run Java.exe as Administrator
Another reason why you fave the Could Not Create the Java Virtual Machine error is the lack of administrative privileges that Java has. Therefore, you have to grant them to resolve the issue. Follow the steps given below to run Java.exe as Administrator:
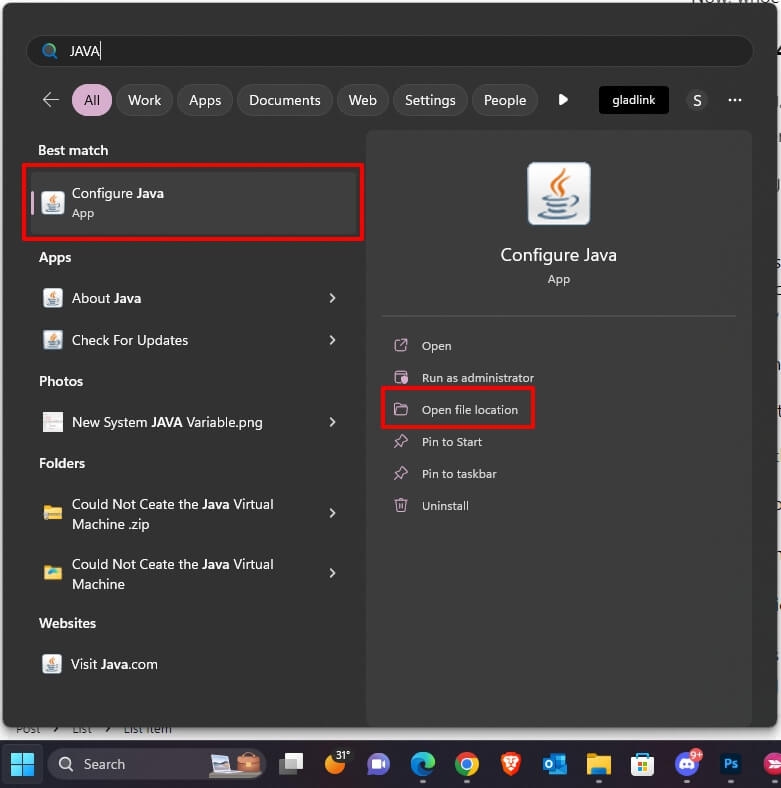
Press the Win key, search for Java, and choose the Open file location from the right pane.
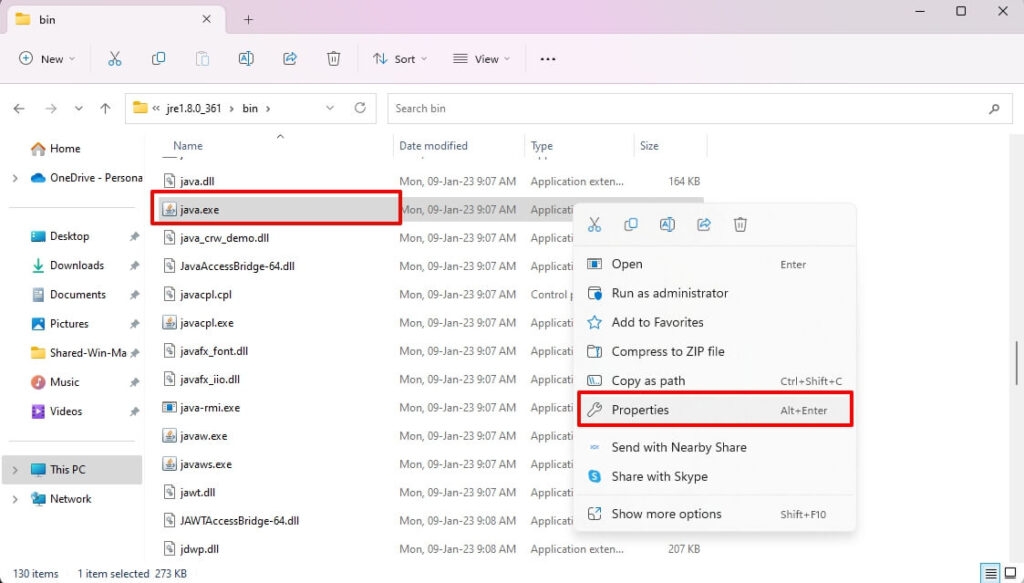
In it, right-click on Java.exe and select Properties from the drop-down menu.
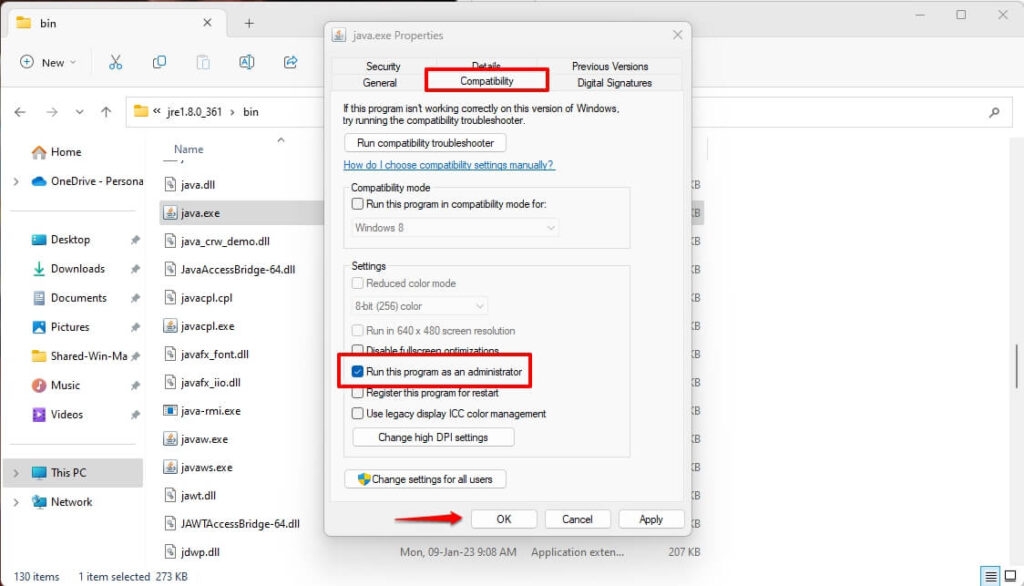
Expand the Compatibility tab and click on the Run as administrator checkbox to enable it.
Press the OK button to save changes.
Whoever you use Java to will run with administrative privileges and resolve the issue.
Method 4: Install the Correct version of JAVA version for Java IDE
If you use Java for programming and face a JVM error in a Java IDE like Eclipse, then you have to check the Java version that your computer has. Here, we are checking for Eclipse. a] See the JREJDK running version of Java IDE
Go to Eclipse main menu, select Help, and click on About Eclipse. Choose Installation Details and click on Configuration. The Eclipse IDE Installation Details pop-up appears; locate the field which begins with -vm. Below -vm, you will see the JDK/JRE version of Java IDE like jdk1.8.0_05 for JDK 8 and so on.
b] Check the JRE/JDK Version that your Windows OS has installed
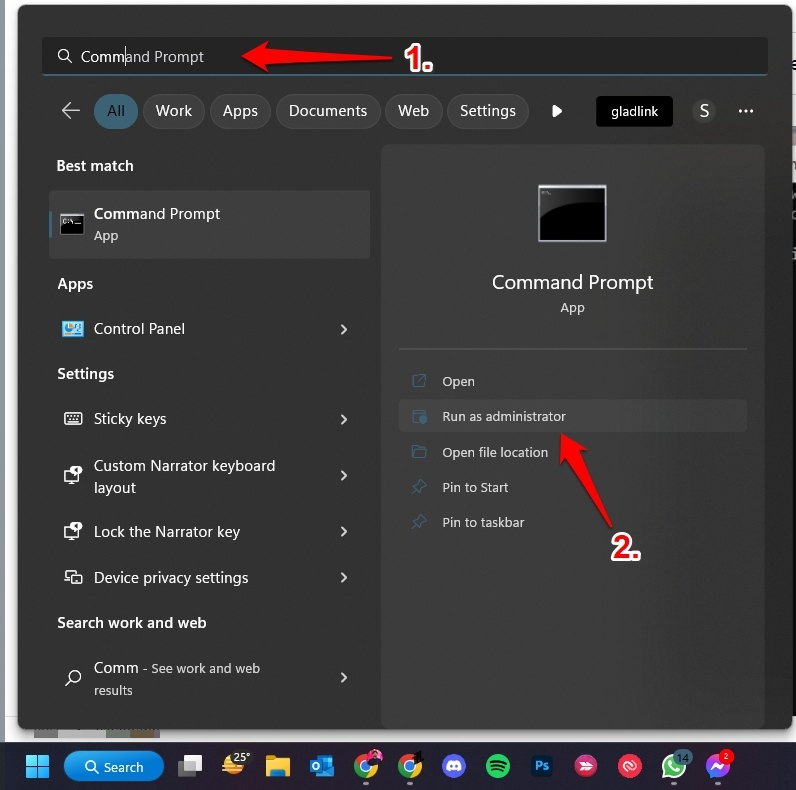
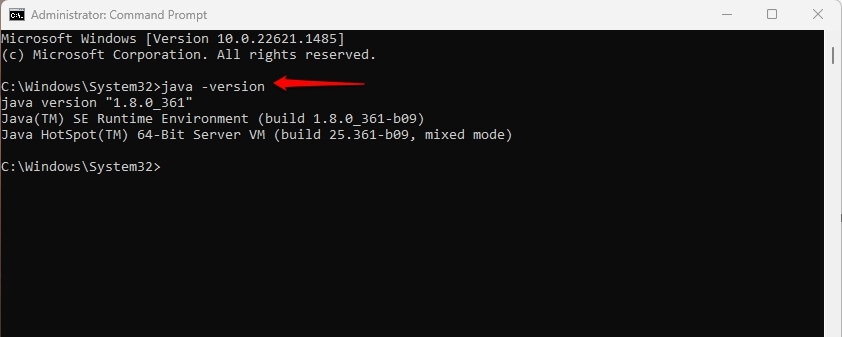
Press the Win key, search for cmd, and select Run as Administrator from the right pane.
Type the text in cmd and Press the Enter key to give the command
If your PC has different JDK and JRE versions, enter the following command to check the JDK version Further, it’s noteworthy that if the Java IDE isn’t compatible with the Java version on your Windows OS, you should install the apt one to fix the error.
Method 5: Reinstall Java
If any of the above methods doesn’t help to resolve the issue, then Java has gone corrupt or has missing components leading to the Could Not Create the Java Virtual Machine error. Hence, reinstalling Java is the ultimate solution in such a case. Follow the steps given below to do so:
Open the website given here in your PC browser and download the Java uninstall the application. Launch it, setup and proceed to uninstall all the Jave versions on your computer. Go to File Explorer and locate C:\Program Files\ or C:\Program Files (x86)\ from the search option.
If you find it, delete the folder permanently and reboot your PC.
Now, download and install the latest Java version from the website given here.
After doing so, you would fix the Could Not Create Java Virtual Machine error.
The Final Word – Could Not Create the Java Virtual Machine
While you were searching for how to troubleshoot the Could Not Create Java Virtual Machine error, you would have got your answer! Try ending all the instances of JVM from Task Manager and try again. If that doesn’t work, then Expand Available memory for Java Applications. Besides, running Java.exe as Administrator helps if a lack of administrative privileges is the reason. If you are a programmer and face an issue in such a case, you should check the JRE/JDK Version of Java IDE. When none of the above helps, reinstall Java. Further Reading:
5 Best GarageBand Alternatives for Windows 10/11 How to Fix the “Operation Failed 0x0000011b” Error on Windows 10 & 11 Top 10 Best Widgets for Windows 11 to take your PC to the Next Level