When you Lock Drive with Password in Windows, it adds an extra layer of security. Windows do come with an in-built tool to password-protect your drive, it’s called Bitlocker. Bitlocker is a software that uses encryption to password-protect drives on Windows 10 OS. You won’t be able to use it if you are using the pirated version of Windows. Here are some of the ways that you can use to Lock Drive with Password in Windows 10.
Steps to Lock Drive with Password in Windows 10
Hidden Disk Software
Hidden Disk also uses encryption to password-protect drives on Windows. What it does is, it creates a virtual disk that is password protected. So if you want to password-protect a drive then you will have to create a ‘Virtual’ protected disk drive from Hidden Disk. Here is how you can do it: Step 1: Download and install Hidden Disk on your PC Step 2: After successful installation, open it from the desktop shortcut icon. You will see an option of “Create Disk” at the bottom right corner. Click on that button Step 3: Once you click on the “Create Disk” button, you will get a warning message that warns you to not format or reinstall Windows otherwise all the data in the hidden disk will be lost. Just make a backup before doing so and you are good. Click on the “I will remember” button. Step 4: Your hidden disk is now created as a separate drive on the file explorer. Add the files and folders that you want to safeguard. Step 5: Once you are done adding the files and folders to the hidden disk, click on the “Disable Disk” button and your hidden disk will be removed from file explorer. Step 6: Now whenever you want to open your hidden disk, just simply open the Hidden Disk application. Select the drive letter and click on the “Create Disk” button. That will open your hidden disk and you get access to it. Step 7: You can also add a password to access your hidden disk. Just click on the link that says, “Create/update password” and fill up your password details and recovery email so that you can recover or create a new password in case your forget the old one. And click on the “Create Password” button. You are all set. You have a hidden drive that is also password protected.
Bitlocker
Bitlocker comes free with Windows OS and lets you encrypt the entire hard drive.Note: This method is not applicable to Windows 10 Home Edition. Here is how you can password-protect your drive using Bitlocker. Step1: Select the drive you want the protect and right click. You will see “Turn on Bitlocker” option, click on that. Step 2: You will see the Bitlocker window, select, “Use a password to unlock the drive” and then enter the password and confirm it. Once you setup the password. Click on Next. Step 3: You will be given three options to get the recovery key. You can select anyone of the three and click Next. Step 4: There will be options and you will be asked how much drive you want to encrypt. Select “Encrypt entire drive” and click Next. Step 5: You will see a confirmation message. Click on “Start encrypting” at the bottom right. You are all set, and your complete drive is password-protected now.
VeraCrypt
VeraCrypt is a free open-source disk encryption software for Windows, Mac OSX and Linux.VeraCrypt main features:
Creates a virtual encrypted disk within a file and mounts it as a real disk.Encrypts an entire partition or storage device such as a USB flash drive or hard drive.Encrypts a partition or drive where Windows is installed (pre-boot authentication).Encryption is automatic, real-time(on-the-fly) and transparent.Parallelization and pipelining allow data to be read and written as fast as if the drive was not encrypted.Encryption can be hardware-accelerated on modern processors.Provides plausible deniability in case an adversary forces you to reveal the password: Hidden volume (steganography) and hidden operating system.
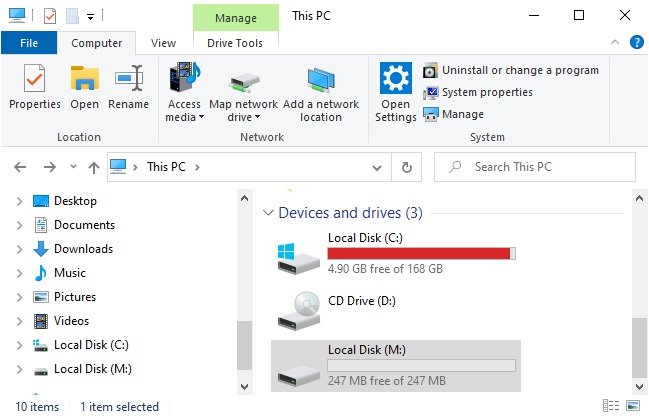
You can read the documentation of VerCrypt here. Follow the below steps to successfully lock drive in Wimdows 10 or any other OS like macOS, Linux, Raspberry Pi, etc: Step 1: Go to the official website of VeraCrypt and download the correct version according to your OS. Step 2: Now, install the download executable file of VeraCrypt by following the on-screen instructions. Step 3: Then launch VeraCrypt by double-clicking the file VeraCrypt.exe or by clicking the VeraCrypt shortcut in your Windows Start menu. Step 4: The main VeraCrypt window should appear. Click Create Volume button. Step 5: In this step, you need to choose where you wish the VeraCrypt volume to be created. A VeraCrypt volume can reside in a file, which is also called a container, in a partition or drive. In this tutorial, we will choose the first option and create a VeraCrypt volume within a file. Step 6: In this step you need to choose whether to create a standard or hidden VeraCrypt volume. In this tutorial, we will choose the former option and create a standard VeraCrypt volume. Step 7: In this step you have to specify where you wish the VeraCrypt volume (file container) to be created. Note that a VeraCrypt container is just like any normal file. It can be, for example, moved or deleted as any normal file. It also needs a filename, which you will choose in the next step. Step 8: In this tutorial, we will create our VeraCrypt volume in the folder F:\Data\ and the filename of the volume (container) will be MyVolume.hc (as can be seen in the screenshot above). You may, of course, choose any other filename and location you like (for example, on a USB memory stick). Note that the file MyVolume.hc does not exist yet – VeraCrypt will create it. Note: VeraCrypt will not encrypt any existing files (when creating a VeraCrypt file container). If you select an existing file in this step, it will be overwritten and replaced by the newly created volume (so the overwritten file will be lost, not encrypted). You will be able to encrypt existing files (later on) by moving them to the VeraCrypt volume that we are creating now. Step 9: In the Volume Creation Wizard window, click Next. Step 10: Here you can choose an encryption algorithm and a hash algorithm for the volume. If you are not sure what to select here, you can use the default settings and click Next. Step 11: Here we specify that we wish the size of our VeraCrypt container to be 250 megabytes. You may, of course, specify a different size. After you type the desired size in the input field, click Next. Step 12: This is one of the most important steps. Here you have to choose a good volume password. Read carefully the information displayed in the Wizard window about what is considered a good password. After you choose a good password, type it in the first input field. Then re-type it in the input field below the first one and click Next. Step 13: Move your mouse as randomly as possible within the Volume Creation Wizard window at least until the randomness indicator becomes green. The longer you move the mouse, the better (moving the mouse for at least 30 seconds is recommended). This significantly increases the cryptographic strength of the encryption keys (which increases security). Click Format. Volume creation should begin. VeraCrypt will now create a file called MyVolume.hc in the folder F:\Data. This file will be a VeraCrypt container (it will contain the encrypted VeraCrypt volume). Depending on the size of the volume, the volume creation may take a long time. After it finishes, the following dialog box will appear: Step 14: We have just successfully created a VeraCrypt volume (file container). In the VeraCrypt Volume Creation Wizard window, click Exit. Step 15: Select a drive letter from the list (marked with a red rectangle). This will be the drive letter to which the VeraCrypt container will be mounted. Step 16: Click Select File. Step 17: In the file selector, browse to the container file (which we created in above steps) and select it. Click Open (in the file selector window). Step 18: In the main VeraCrypt window, click Mount. Password prompt dialog window should appear. Step 19: Type the password in the password input field (marked with a red rectangle). Step 20: Select the PRF algorithm that was used during the creation of the volume (SHA-512 is the default PRF used by VeraCrypt). If you don’t remember which PRF was used, just leave it set to “autodetection” but the mounting process will take more time. Click OK after entering the password. We have just successfully mounted the container as a virtual disk M: The virtual disk is entirely encrypted (including file names, allocation tables, free space, etc.) and behaves like a real disk. You can save (or copy, move, etc.) files to this virtual disk and they will be encrypted on the fly as they are being written. If you open a file stored on a VeraCrypt volume, for example, in a media player, the file will be automatically decrypted to RAM (memory) on the fly while it is being read. Note: The above tutorial is the courtesy of VeraCrypt.fr. You check the original guide here.
Conclusion
These were two ways with which you can password-protect your drive and confidential data. However, these are not foolproof. Make sure you use a different and unique password, so it becomes hard for someone to crack your password. But yes, these apps help a lot in adding extra security layers.
Read More About
How to Add Guest Account in Windows 10?How to Reset Login Password in Windows 10?How to Customize Icons in Windows 10?