Well, Google USB drivers are required to connect a Google Nexus or Google Pixel device to your PC over a USB connection. Connecting your phone to PC is important when you are working with Android ADB and Fastboot tools. Generally, these required USB drivers come with Android Studio IDE but if you are a general user, chances are that you do not have this software on your PC. In this article, we are going to show you how to download and install Google USB drivers for Windows. So, follow the steps and methods mentioned below.
How to Download and Install Google USB Drivers for Windows
How to Download Google USB Drivers
Direct Download
To download the Google USB driver directly, you can just click on the link given below. After the download, extract the file to any suitable location and make sure the extracted folder “usb_drivers” has “android_winsb.inf” driver file.
Via Android Studio
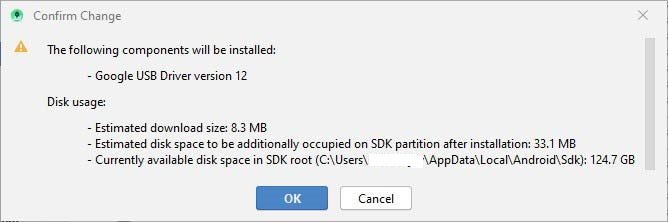
Make sure that you have the latest version of Android Studio on your PC. Then follow these steps: Step 1: Open Android Studio on your PCStep 2: Go to ‘Tools’ and select ‘SDK Manager’, then go to the ‘SDK Tools’ tab.Step 3: Select the ‘Google USB Driver’ and click Ok.Step 4: Now you will see a ‘Confirm change’ message, click Ok. Step 5: You will see the ‘License Agreement’, click on ‘Accept’ then click on ‘Next’. Now the required drivers will be installed to “android_sdk\extras\google\usb_driver\” on your PC. “android_sdk” is where you have installed Android SDK.
How to Install Google USB Drivers
On Windows 10
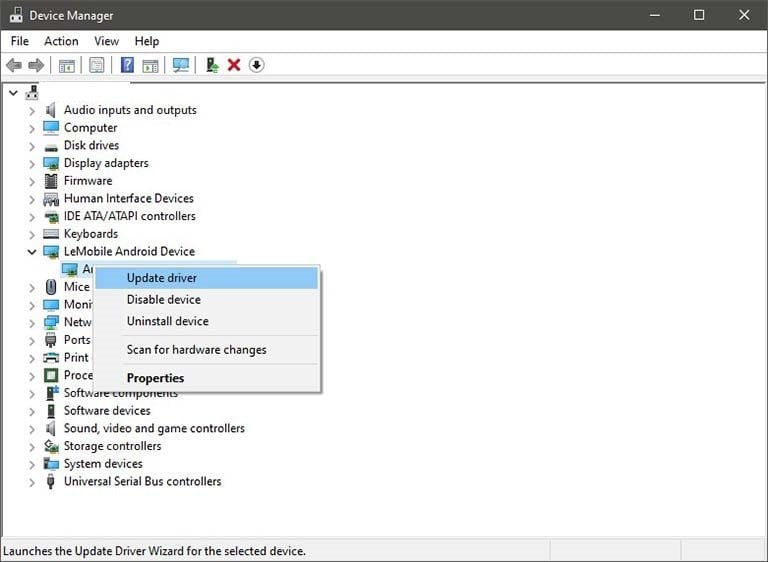
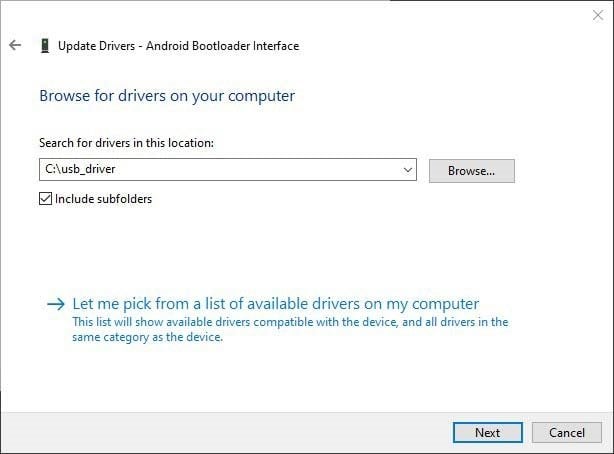
Step 1: Connect your device to the PC via USB, now go to Control Panel and click on ‘Device Manager’.Step 2: Double-click on your device category to expand the list of connected devices.Step 3: Now right-click on your device’s name and select ‘Update driver’. Step 4: Click on ‘Browse my computer for driver software’ in the wizard.Step 5: Click ‘Browse’ and select the ‘usb_driver’ folder from the location where you have extracted the ZIP file or if you have used Android SDK, go to the path “android_sdk\extras\google\usb_driver\”. Step 6: Click on ‘Next’ and complete the wizard and the divers will be installed. After successful installation, restart your PC.
On Windows 7 and Windows 8/8.1
Step 1: Connect your device to the PC via USB.Step 2: Right-click on ‘Computer’ and click on ‘Manage’.Step 3: On the left side, select ‘Devices’ and then double-click on ‘Other Device’ on the right side to expand it.Step 4: Now right-click on the device name and select ‘Update driver’ option.Step 5: Click on ‘Browse my computer for driver software’ in the wizard.Step 6: Click ‘Browse’ and select the ‘usb_driver’ folder from the location where you have extracted the ZIP file or if you have used Android SDK, go to the path “android_sdk\extras\google\usb_driver\”.Step 7: Click on ‘Next’ and complete the wizard and the divers will be installed. After successful installation, restart your PC. That’s it and you are all set. That is all about how to download and install Google USB drivers on Windows. Do try these methods and let us know. Important: If the drivers fail to install after all the steps mentioned above or you are unable to execute ADB/Fastboot command, chances are that you are using an AMD based PC or you are connected to the device via USB 3.0/3.1/3.2 port. This issue is faced by a lot of users lately, to solve this, try connecting via USB 2.0 port and/or switch to Intel-based PC for doing the ADB/Fastboot.