The first developer preview build has just been released and offers us an early insight into what is to come. We did a deep insight into all the technicalities and UI tweaks [so that you don’t have to] and if the long list of features does manage to checkmark your requirement, then we will also make you aware of four different methods to install the latest Android 14 onto your device. So without any further ado, let’s jump onto the bandwagon right away.
What’s New in Android 14?
Without digging deep into the technical aspects and scattering tech jargon everywhere, here are all the new [and some enhanced] features in the fourteenth iteration of the OS. Do note that this list is prepared a the time of Developer Preview 1 and there are changes that some o these features might be tweaked [or removed altogether] whereas you might also see the addition of a few others in the near future. We will be updating this section as soon as any such development takes place, so do give it a visit at regular intervals.
Give App Access to Individual Files!
One of my favorites! You no longer have to grant the entire gallery access to an app, rather you could just give it access to the individual image or video that you need to upload. A big plus from the security and privacy point of view.
Native App Cloning
The ability to clone apps has now been directly built-in into the OS. Up until this point, a few OEMs [such as OnePlus and Xiaomi] did provide this functionality, but the rest of the users had to be dependent on third-party apps. Well, you could now bid adieu to all those third-party apps for good.
Battery menu UI changes
There is quite a lot going on in the Battery domain. For starters, the Extreme Battery Saver and Adaptive Battery options have now been moved to this section. Likewise, the minimum battery % threshold has been increased from 10% to 20%. Moreover, the “app usage” & “system usage” sections are now shown separately. There’s also an addition of a new member in the form of Battery Saver Reminders.
New Back Gesture
Till Android 13, once you perform a back gesture by swiping from either side of the screen, then the app will straightaway close. However, with Android 14, you now get a Predictive Back Gesture, meaning it will give you a sneak peek of what’s behind that app, or in other words, the screen that you will be taken to once you close the app. So you could now decide accordingly whether or not is the right time and place to go back to that screen [sshhhh]!
Fast Pair
Fast Pair is the successor to Android Beam which will allow you to seamlessly transfer files between various devices. You could access it from Settings > Connected devices > Connection preferences. [It was also present in Android 13 testing builds, but was subsequently removed from the fourth beta, let’s hope it doesn’t meet a similar fate this time around!].
Preinstalled Health App
It gets challenging in using numerous health apps and managing data between them, but due to the non-compatibility between various platforms, we didn’t have much choice either. All that is about to change with Android 14, thanks to the introduction of the Health Connect App [by Google and Samsung]. The app now comes preinstalled so you could use it straight out of the box.
Limitation on Sideloading Older Apps
You will no longer be able to sideload apps that target API level 22 (Android 5.1 Lollipop) or earlier versions. On the other hand, if you try to sideload apps that target API level 27 or lower (ie. Android 8.1 or older), then you will just get a warning prompt, which you could easily bypass and install the app.
Some Other Changes
Allow us to exercise just a small degree of freedom and use a few technical jargons, shall we? There have been a couple of additions to the Developer Menu [such as the NFC verbose vendor debug log][ and the additional as well as the removal of a few root certificates. Moroever, EID, and IMEI are now hidden under the About Phone and you will have to tap on them to view So these were all the noteworthy features in the latest OS build. Let’s now make you aware of its release schedule before moving over to the four different methods to install Android 14 onto your device.
Android 14 Release Timeline
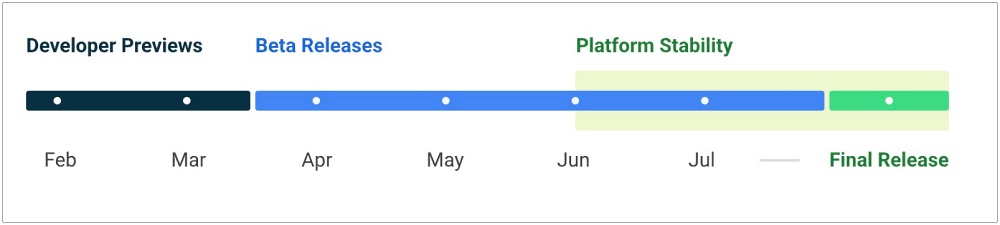
The first Developer Preview was released in February, and the second is slated for next month, i.e. March. After this, is the turn of beta releases, which will start in April and go until July. From Beta 3 onwards in the month of June, Android 14 will reach the stage of performance stability, so even though it will be in a beta stage, it would be slightly more stable than its predecessors.
Moroever, we might see at least 5 Beta builds, with the possibility of the addition of a couple of others before we ultimately reach the stable stage [whose timeline has not yet been finalized, but it will definitely be after July]. So if that’s quite a long waiting time, then you could skip this queue and welcome the latest OS build onto your device right away. Follow along.
All Android 14 Bugs, Issues, and their Fixes
You could refer to our detailed guide regarding all the bugs/issues [and their fixes] that you are likely to come across in numerous Android 14 builds [betas and stable].
How to Install Android 14 on any Android Device [4 Methods]
We have listed four different methods through which you could install the Android 14 build onto your device, along with the perks and risks of each approach. So go through them carefully and decide accordingly. Moroever, irrespective of the method you end up choosing, please take a backup of all the data beforehand. NOTE: If you ever want to downgrade to the stable Android 13 build [explained later on], then you will have to unlock the device’s bootloader[ which will reset the device and might nullify the warranty]. If you don’t want to unlock the bootloader for some reason, then you have no choice but to stay on Android 14. Droidwin and its members wouldn’t be held responsible in case of a thermonuclear war, your alarm doesn’t wake you up, or if anything happens to your device and data by performing the below steps.
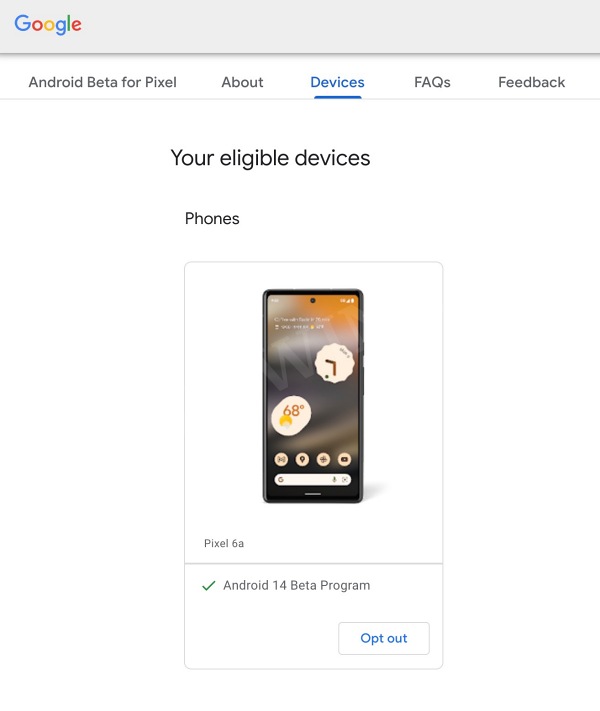
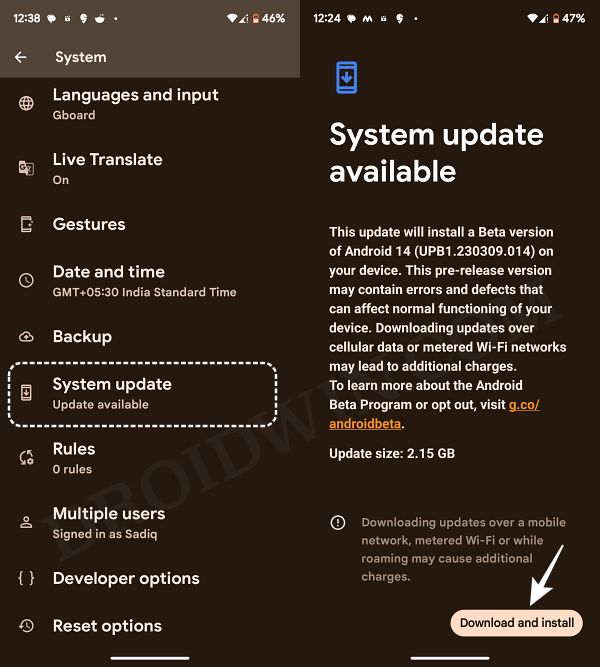
Install Android 14 via Opt-In [New]
If you want to install one of the Android 14 beta builds, then you could easily do so from the Android Beta Program website. This is by far the easiest and shortest method to get this job done. With that said, here’s what you need to do:
Install Android 14 via ADB Sideload
STEP 1: Install Android SDK
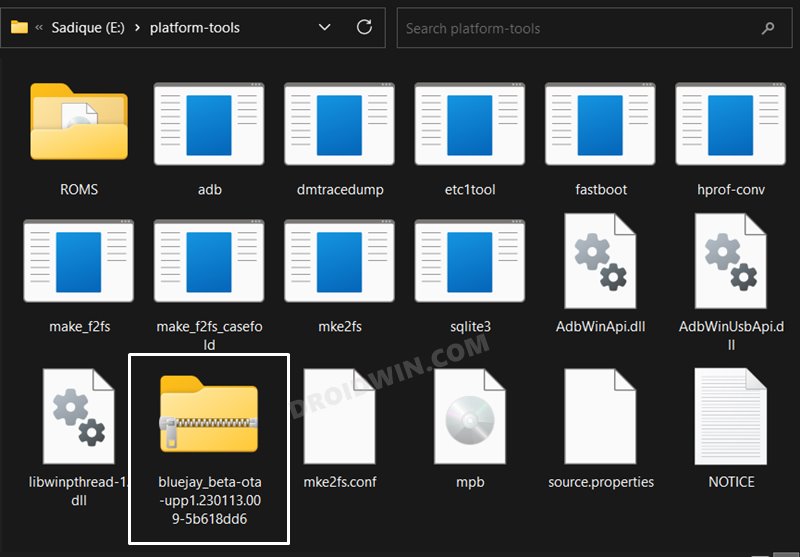
First and foremost, you will have to install the Android SDK Platform Tools on your PC. This is the official ADB and Fastboot binary provided by Google and is the only recommended one. So download it and then extract it to any convenient location on your PC. Doing so will give you the platform-tools folder, which will be used throughout this guide.
STEP 2: Download Android 14 OTA Image
You may now download the Android 14 OTA corresponding to your device from here. Since we are using the ADB Sideload method, you should download the OTA file (and not the Factory Image). Moreover, once you have downloaded the firmware, transfer it to the platform tools folder on your PC. Likewise, rename the file to update, so that the complete name becomes update.zip. [so that it becomes easier to type in the Command Prompt].
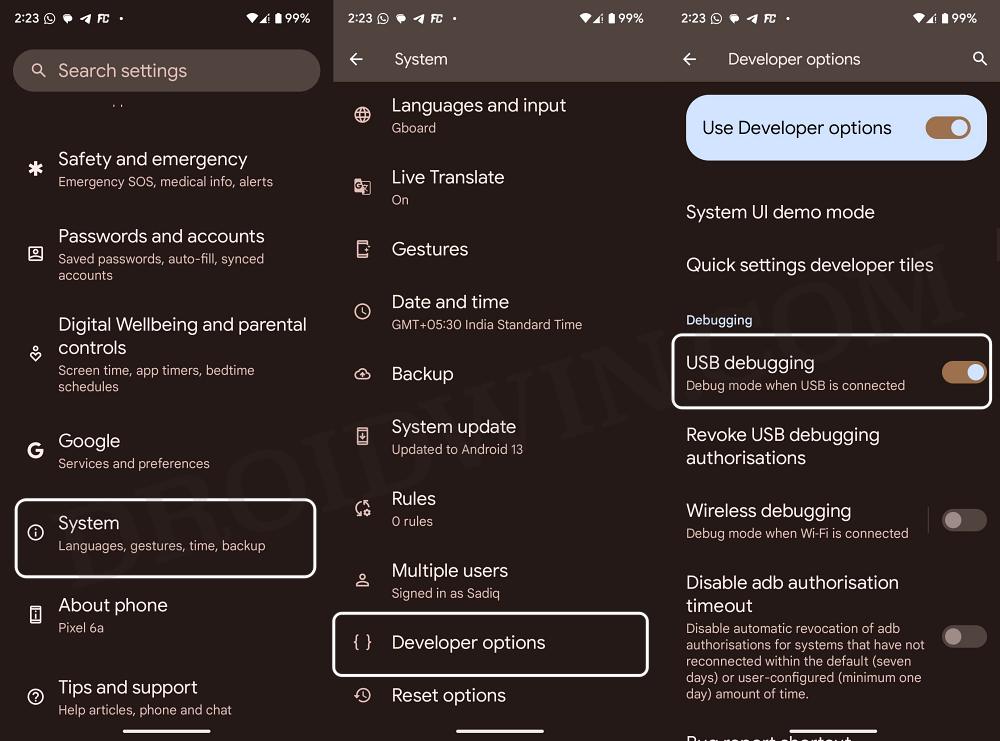
STEP 3: Enable USB Debugging
Next up, you will have to enable USB Debugging so that your device is recognizable by the PC in ADB mode. This will then allow you to boot your device to Recovery Mode. So head over to Settings > About Phone > Tap on Build Number 7 times > Go back to Settings > System > Advanced > Developer Options > Enable USB Debugging.
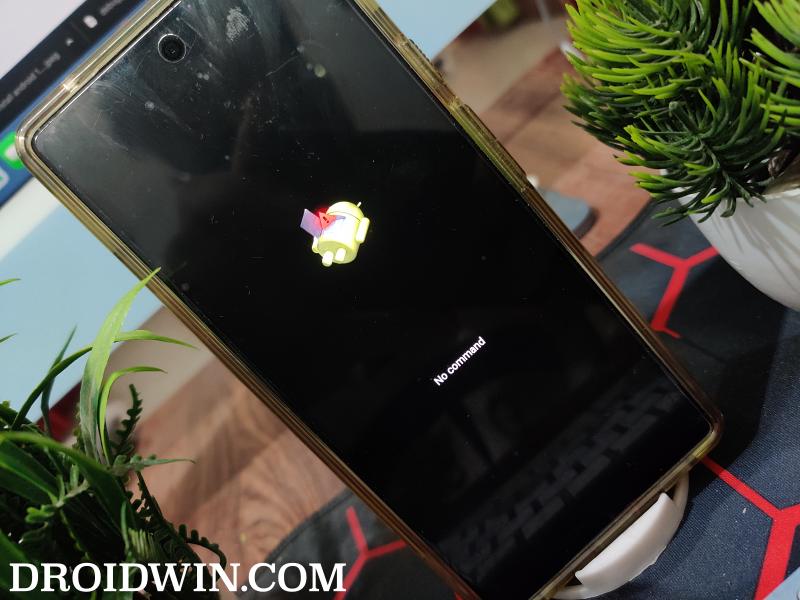
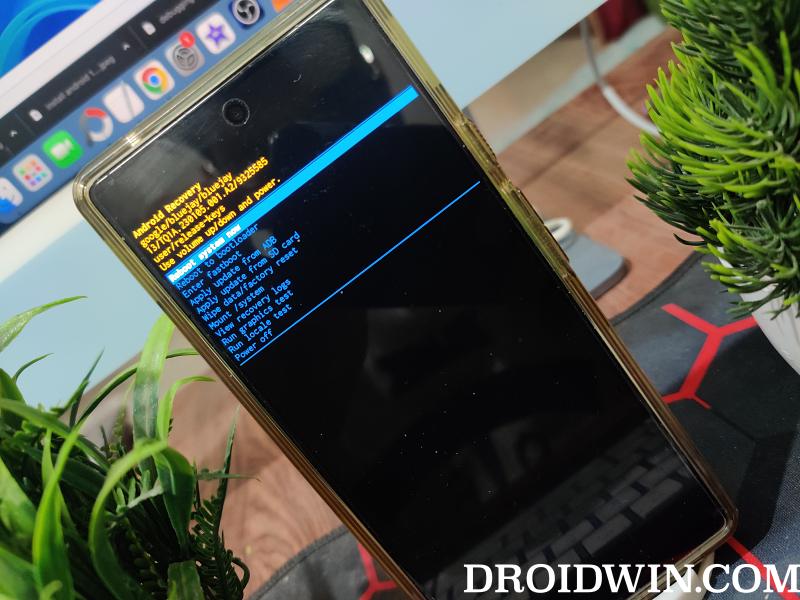
STEP 4: Boot to Stock Recovery
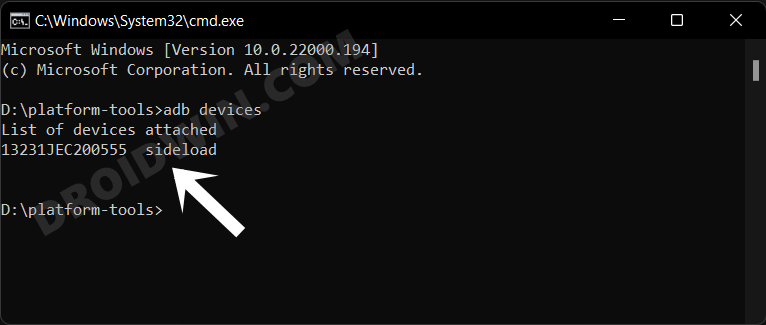
STEP 5: Install Android 14 Via ADB Sideload
That’s it. These were the steps to install Android 14 onto your device via ADB Sideload. Let’s now check out the rest of the three methods.
Install Android 14 via Android Flash Tool
STEP 1: Install Android SDK
First and foremost, you will have to install the Android SDK Platform Tools on your PC. This is the official ADB and Fastboot binary provided by Google and is the only recommended one. So download it and then extract it to any convenient location on your PC. Doing so will give you the platform-tools folder, which will be used throughout this guide.
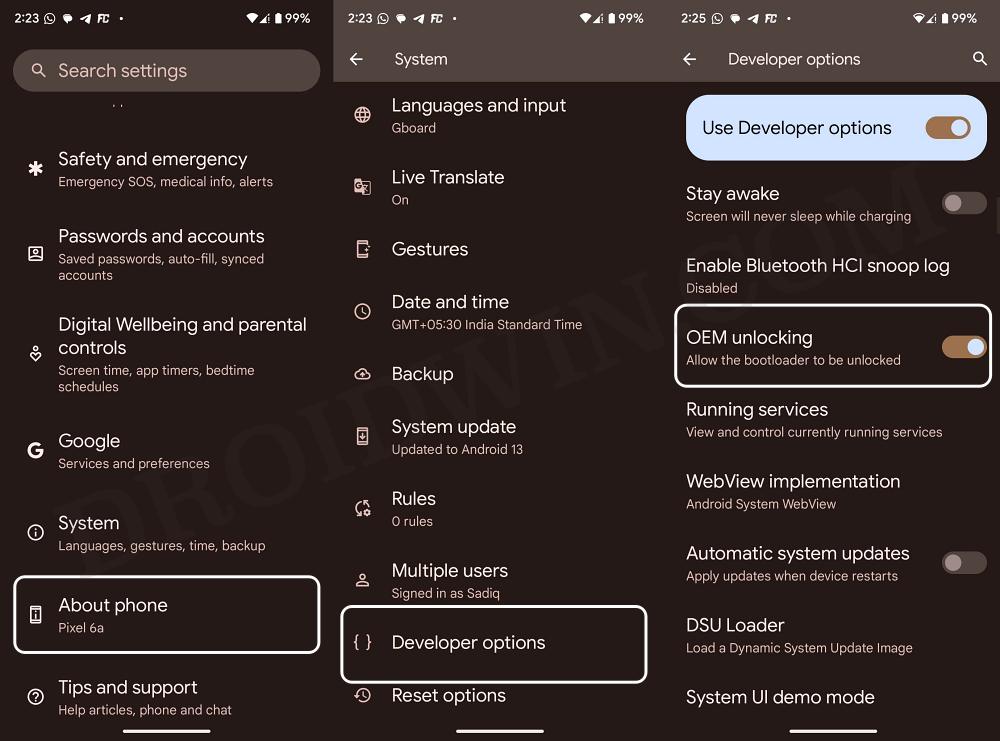
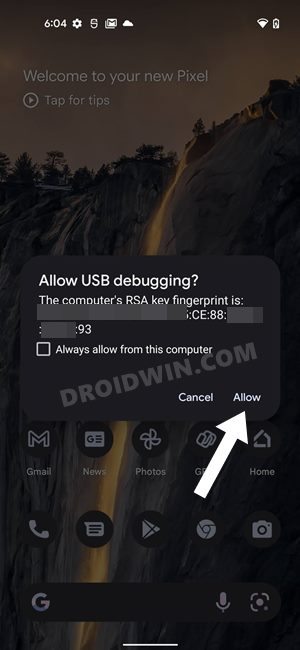
STEP 2: Enable USB Debugging and OEM Unlocking
Next up, you will also have to enable USB Debugging and OEM Unlocking on your device. The former will make your device recognizable by the PC in ADB mode. This will then allow you to boot your device to Fastboot Mode. On the other hand, OEM Unlocking is required to carry out the bootloader unlocking process.
So head over to Settings > About Phone > Tap on Build Number 7 times > Go back to Settings > System > Advanced > Developer Options > Enable USB Debugging and OEM Unlocking.
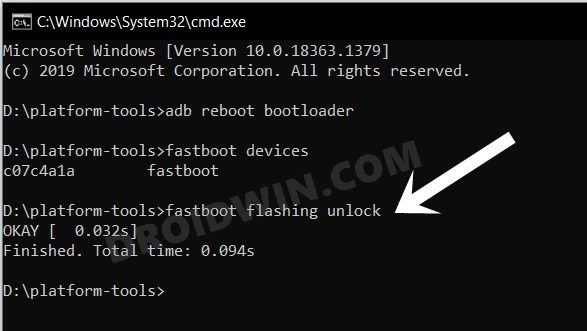
STEP 3: Unlock Bootloader
In order to flash the Android 13 firmware on your Pixel device via Android Flash Tool, you will have to unlock the device’s bootloader as well. If you haven’t done so, then you may refer to our guide on How to Unlock Bootloader on Google Pixel Devices.
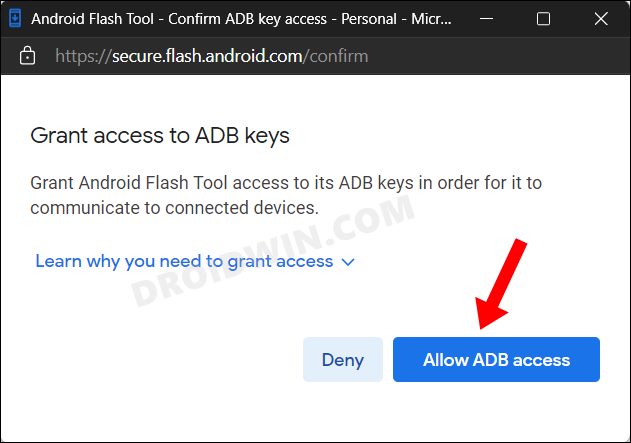
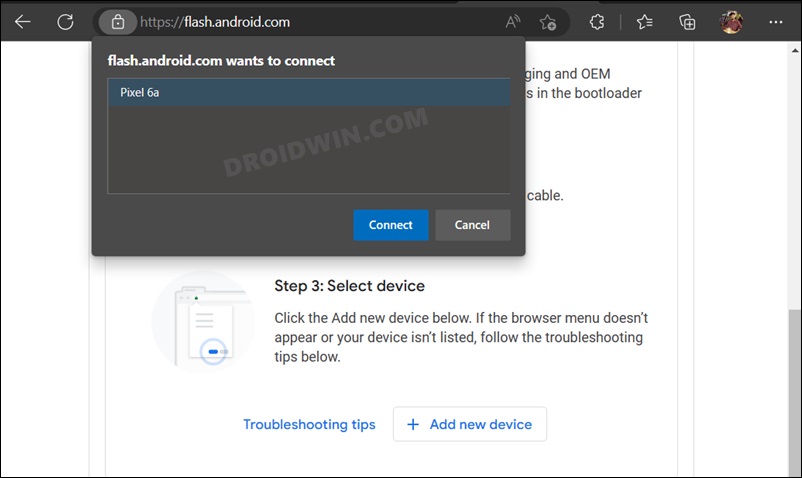
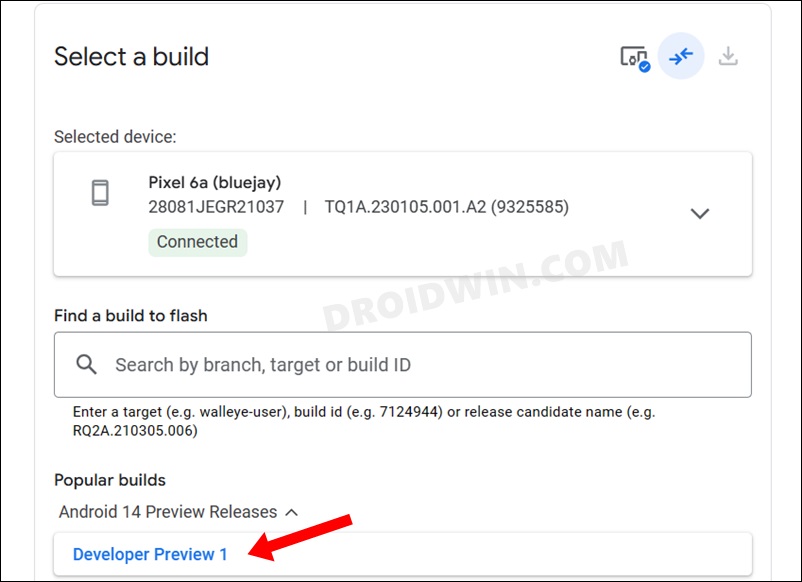
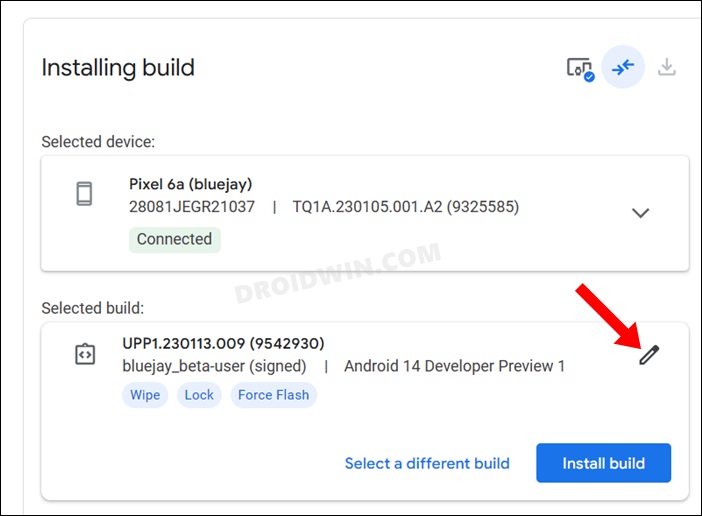
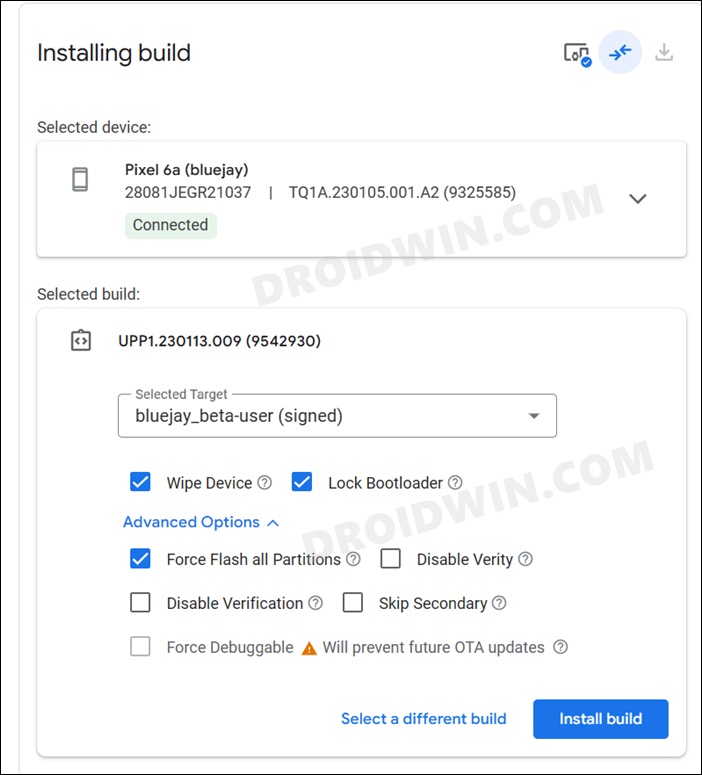
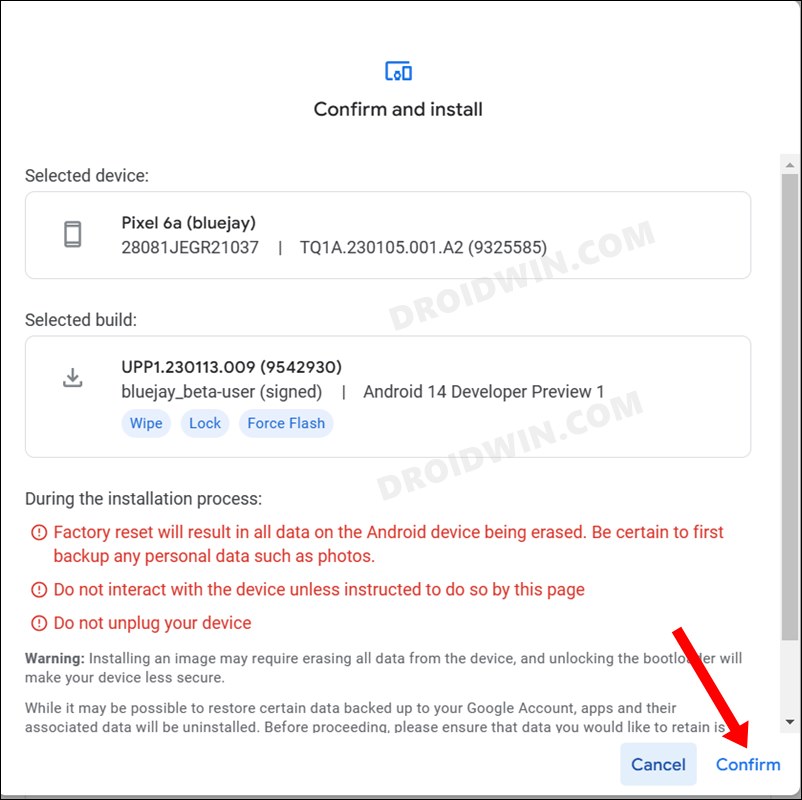
STEP 4: Install Android 14 via Android Flash Tool
That’s it. These were the steps to install Android 14 on your device using the Android Flash Tool. Let’s now have a look at the remaining two methods.
Install Android 14 via Fastboot Command
STEP 1: Install Android SDK
First and foremost, you will have to install the Android SDK Platform Tools on your PC. This is the official ADB and Fastboot binary provided by Google and is the only recommended one. So download it and then extract it to any convenient location on your PC. Doing so will give you the platform-tools folder, which will be used throughout this guide.
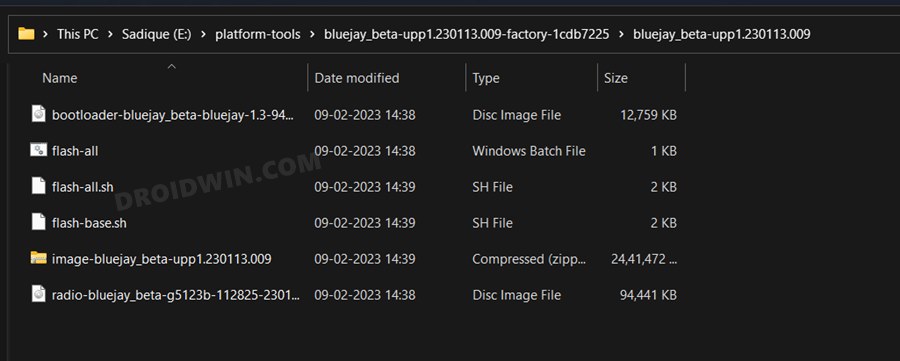
STEP 2: Download Android 14 Factory Image
You may now download the Android 14 factory image corresponding to your device. Since we are using the Fastboot method, you should download the Factory Image (and not the OTA file). Moreover, once you have downloaded the firmware, extract it to the platform tools folder.
STEP 3: Enable USB Debugging and OEM Unlocking
Next up, you will have to enable USB Debugging and OEM Unlocking on your device. The former will make your device recognizable by the PC in ADB mode. This will then allow you to boot your device to Fastboot Mode. On the other hand, OEM Unlocking is required to carry out the bootloader unlocking process.
So head over to Settings > About Phone > Tap on Build Number 7 times > Go back to Settings > System > Advanced > Developer Options > Enable USB Debugging and OEM Unlocking.
STEP 4: Unlock Bootloader
Next up, you will also have to unlock the device’s bootloader. Do keep in mind that doing so will wipe off all the data from your device and could nullify its warranty as well. So if that’s all well and good, then please refer to our detailed guide on How to Unlock the Bootloader on any Android Device.
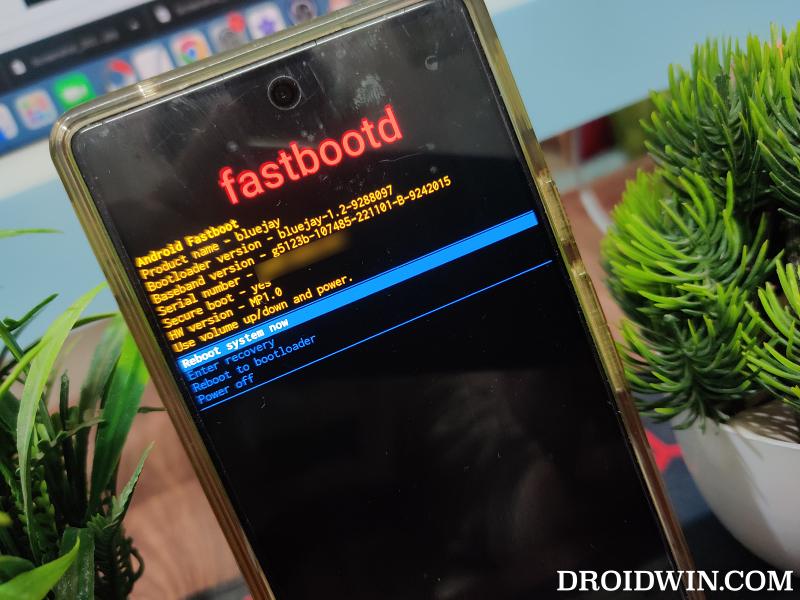
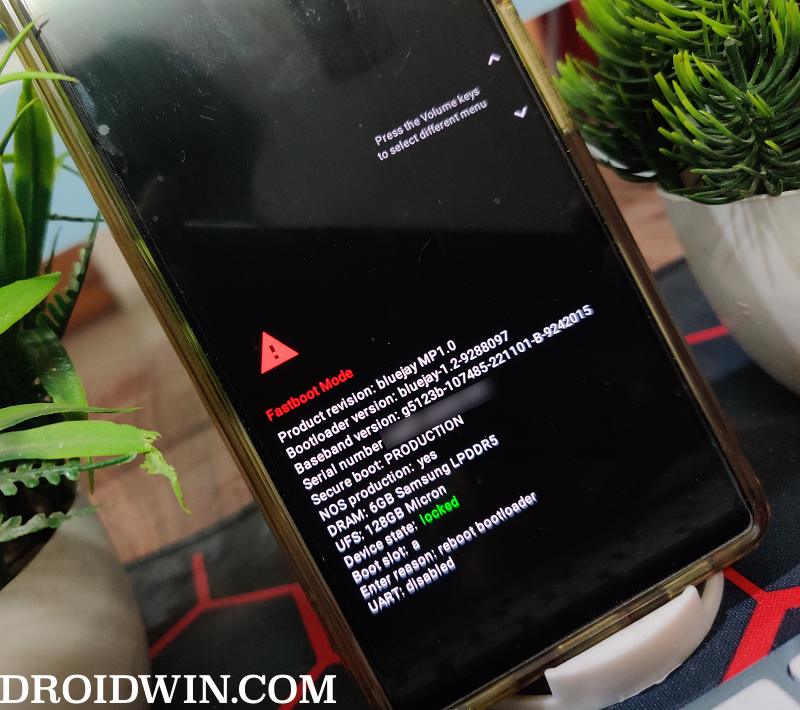
STEP 5: Boot to Fastboot Mode
STEP 6: Preserve Data [Optional]
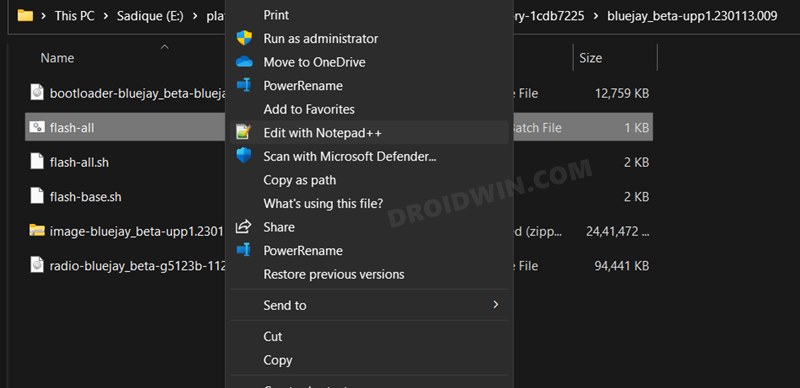
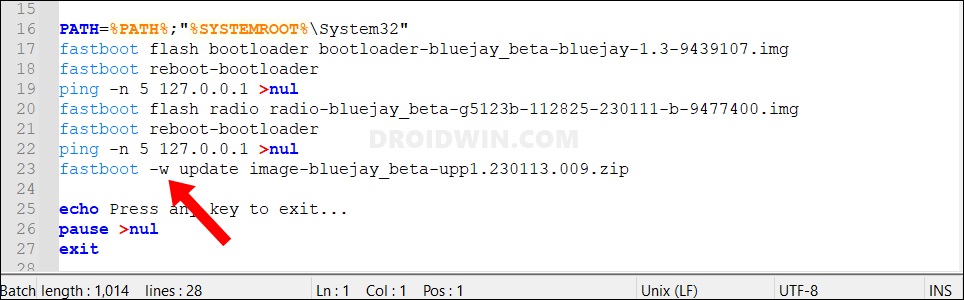
If you want, you may tweak the flash file and instruct it not to delete the data while installing Android 13. However, that isn’t the recommended thing and should be avoided, more so if you are doing OS upgrades. Still, if you wish to try it out, then here’s what you need to do:
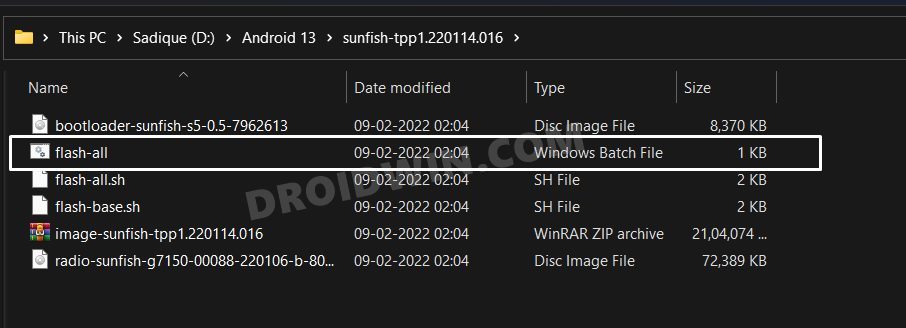
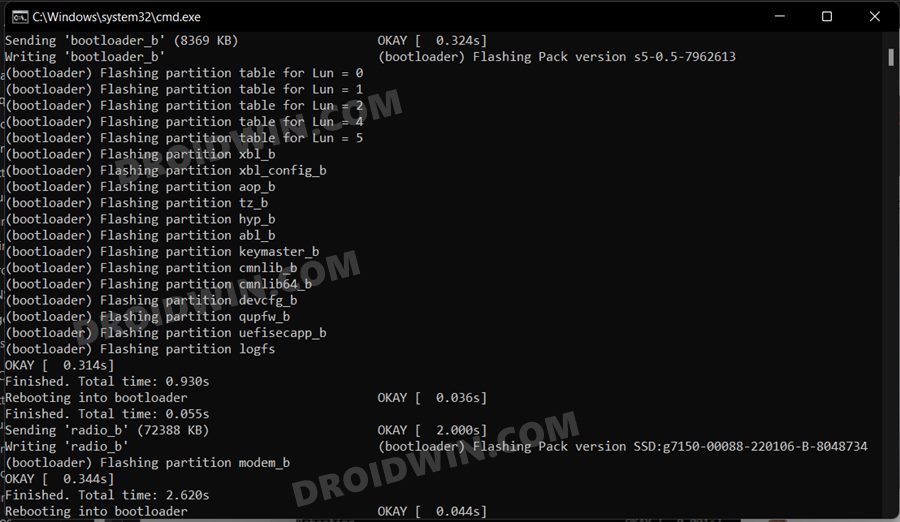
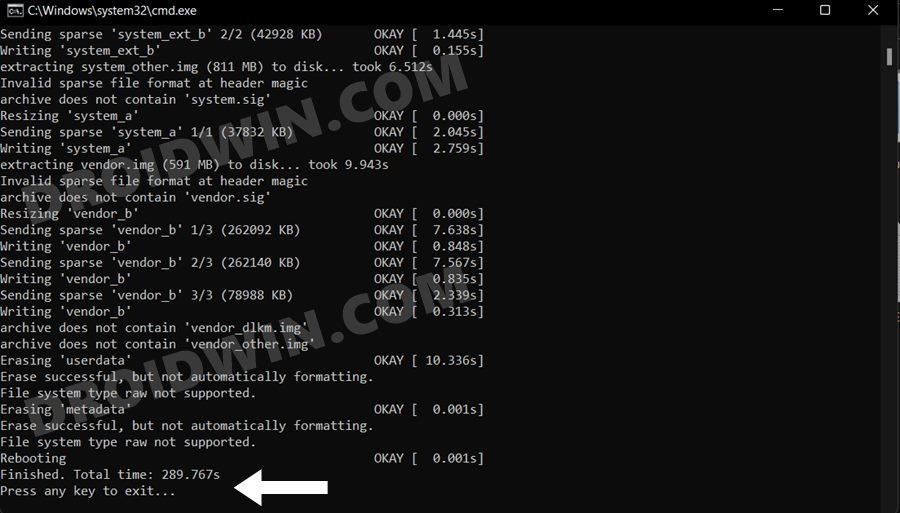
STEP 7: Install Android 14 via Flash-All
That’s it. These were the steps to install the latest Android 14 onto your device via Fastboot. Let’s now check out the fourth and final method to get this job done.
Install Android 14 via GSI Image
if you own a non-Pixel device, then as of now your only course of action is to flash an Android 14 GSI build. However, do note that this process requires an unlocked bootloader. So if that’s well and good, then do check out our guide on How to Install Android 14 GSI on any Device.
So these were the four different methods through which you could install Android 14 on your device. This is a developing story and will be continuously updated as and when there are any changes made, new features introduced, or a new build is released. Moreover, if you have any queries concerning the aforementioned steps, do let us know in the comments. We will get back to you with a solution at the earliest.
How to Downgrade from Android 14 to Android 13
If there are way too many bugs, you are facing performance issues, or apps are not working along the expected in this latest OS build, then your best course of action is to downgrade to the earlier stable build, i.e. Android 13. You could carry out this process via Android Flash Tool or Fastboot Commands, both of which require an unlocked bootloader. So if that’s well and good, then do check out our guide on How to Downgrade Pixel from Android 14 to Android 13 [2 Methods].
About Chief Editor